Define the content model
So far, our Craft Commerce site only supports us selling our own products. We want to support multiple vendors, so we need to make some edits to our content model to do this.
Create the connection field
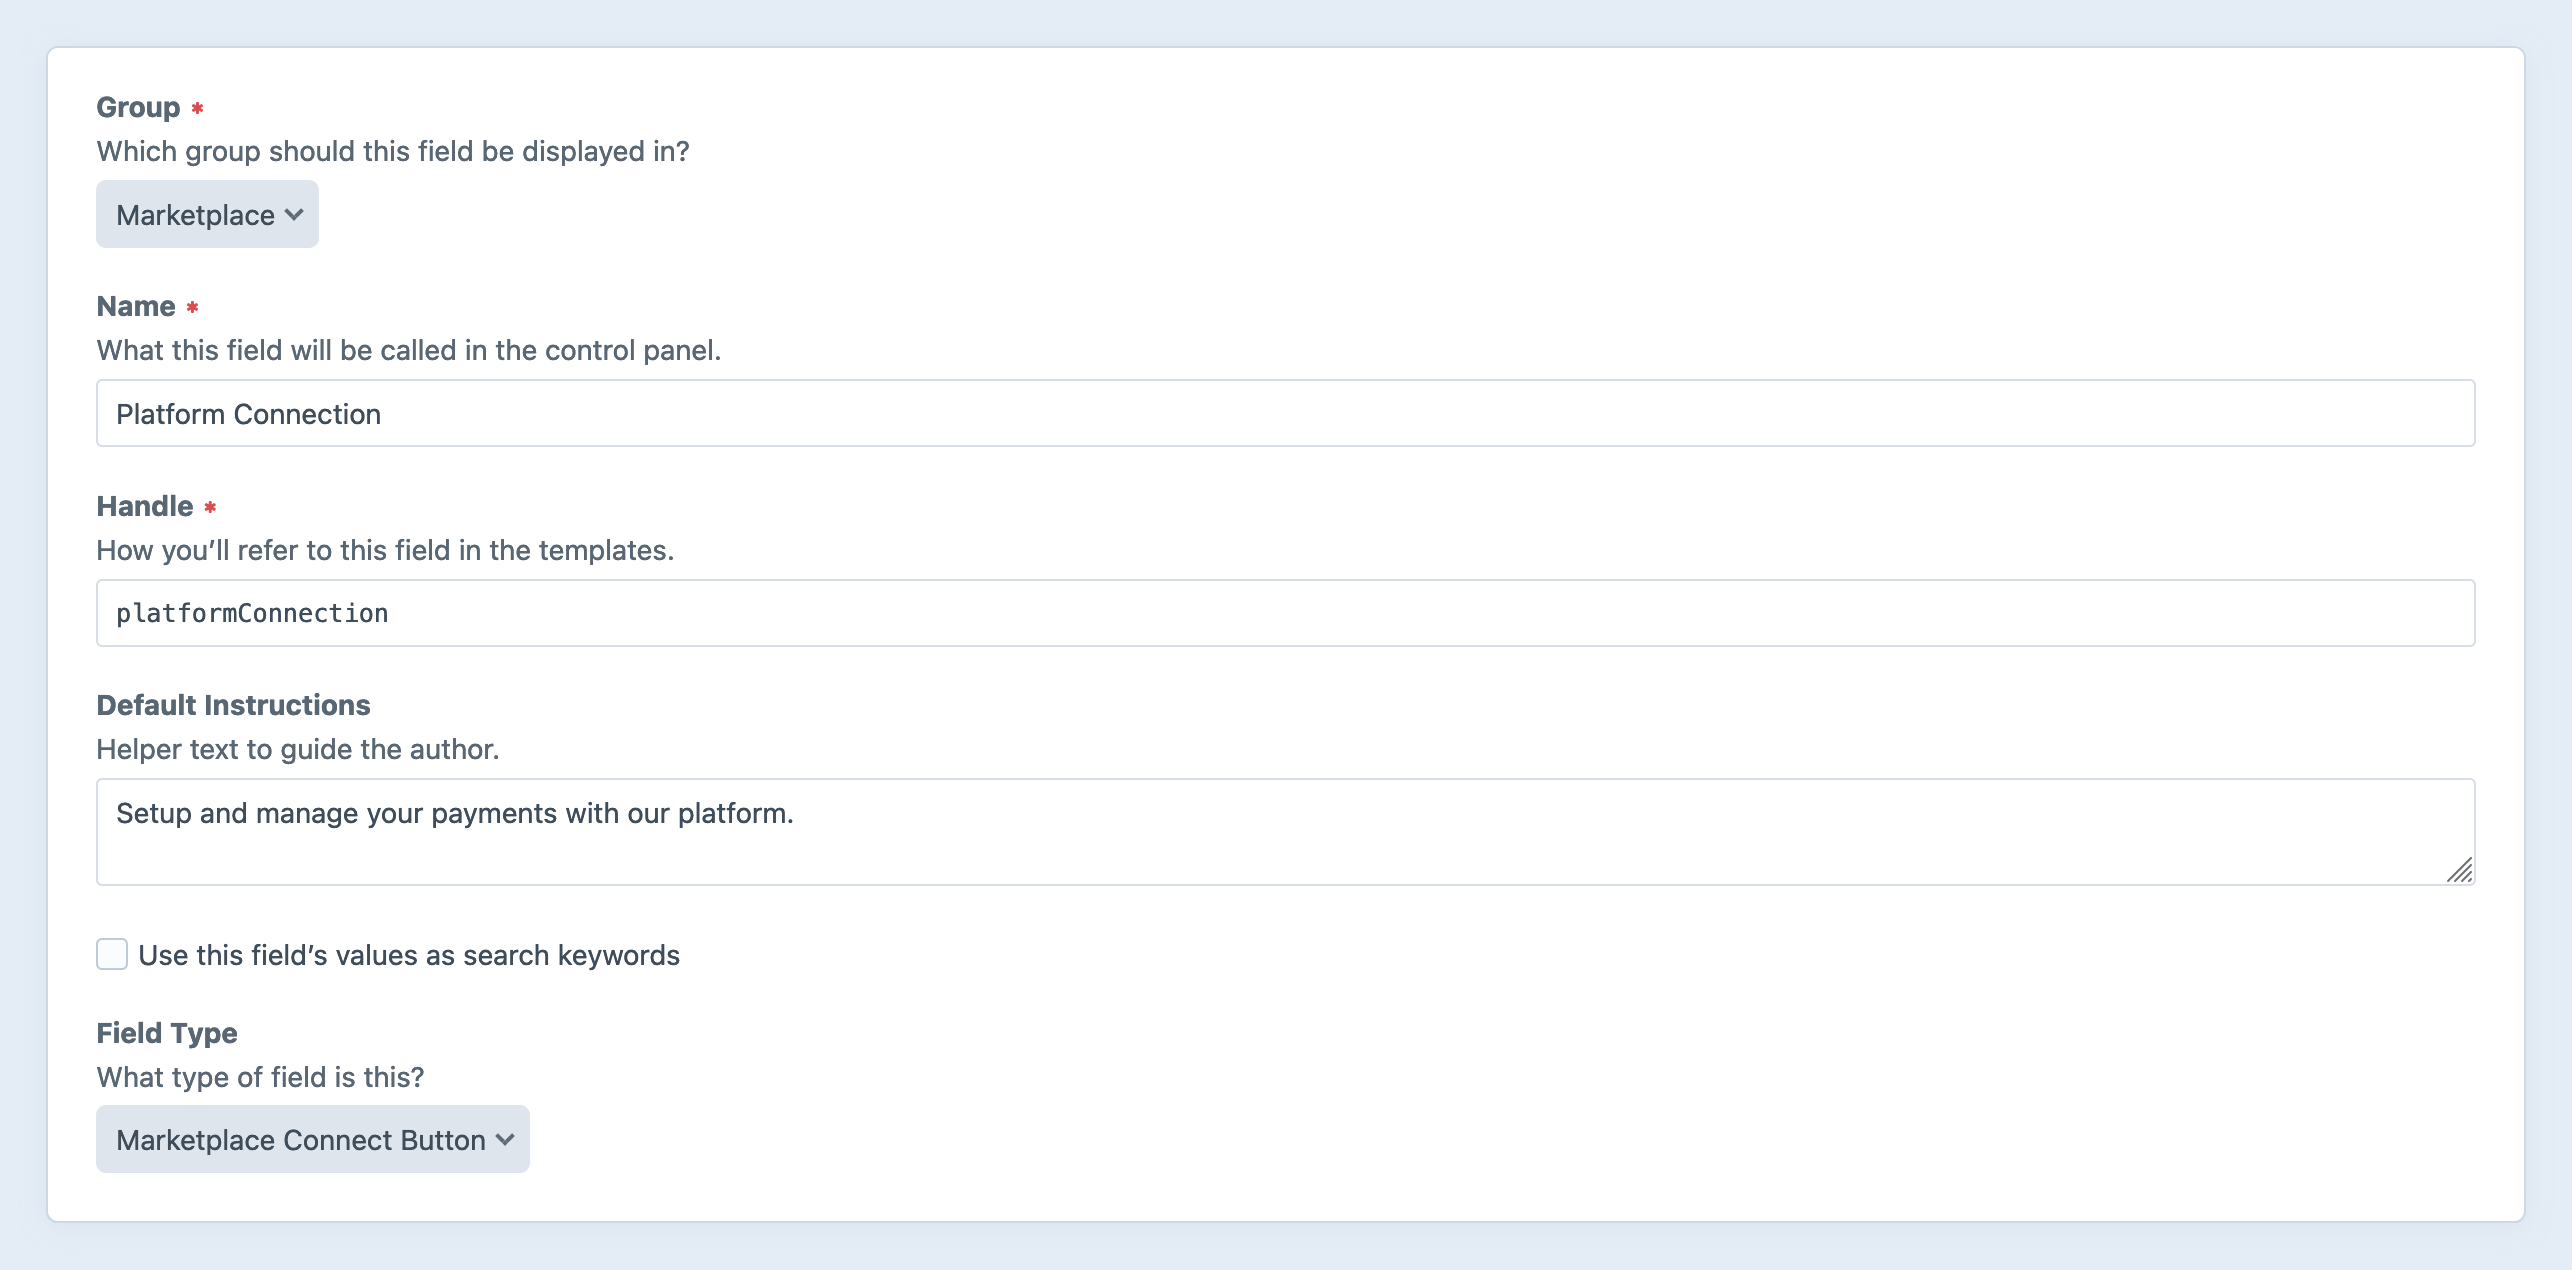
First, create a new Marketplace Connect Button field, provided by the Marketplace plugin.
It will represent the connection between Stripe and Craft. For our coffee marketplace, we’ll label it “Platform Connection.”
Create a section for vendors
Your marketplace will need to onboard vendors. In Craft, these vendor organizations will either be represented by users or by entries.
Like Craft, Marketplace leaves it up to you how to model content for your marketplace, but it’s almost always better to choose entries.
This will allow multiple users login to and be associated with a single vendor—even if you don’t need that feature in the short term.
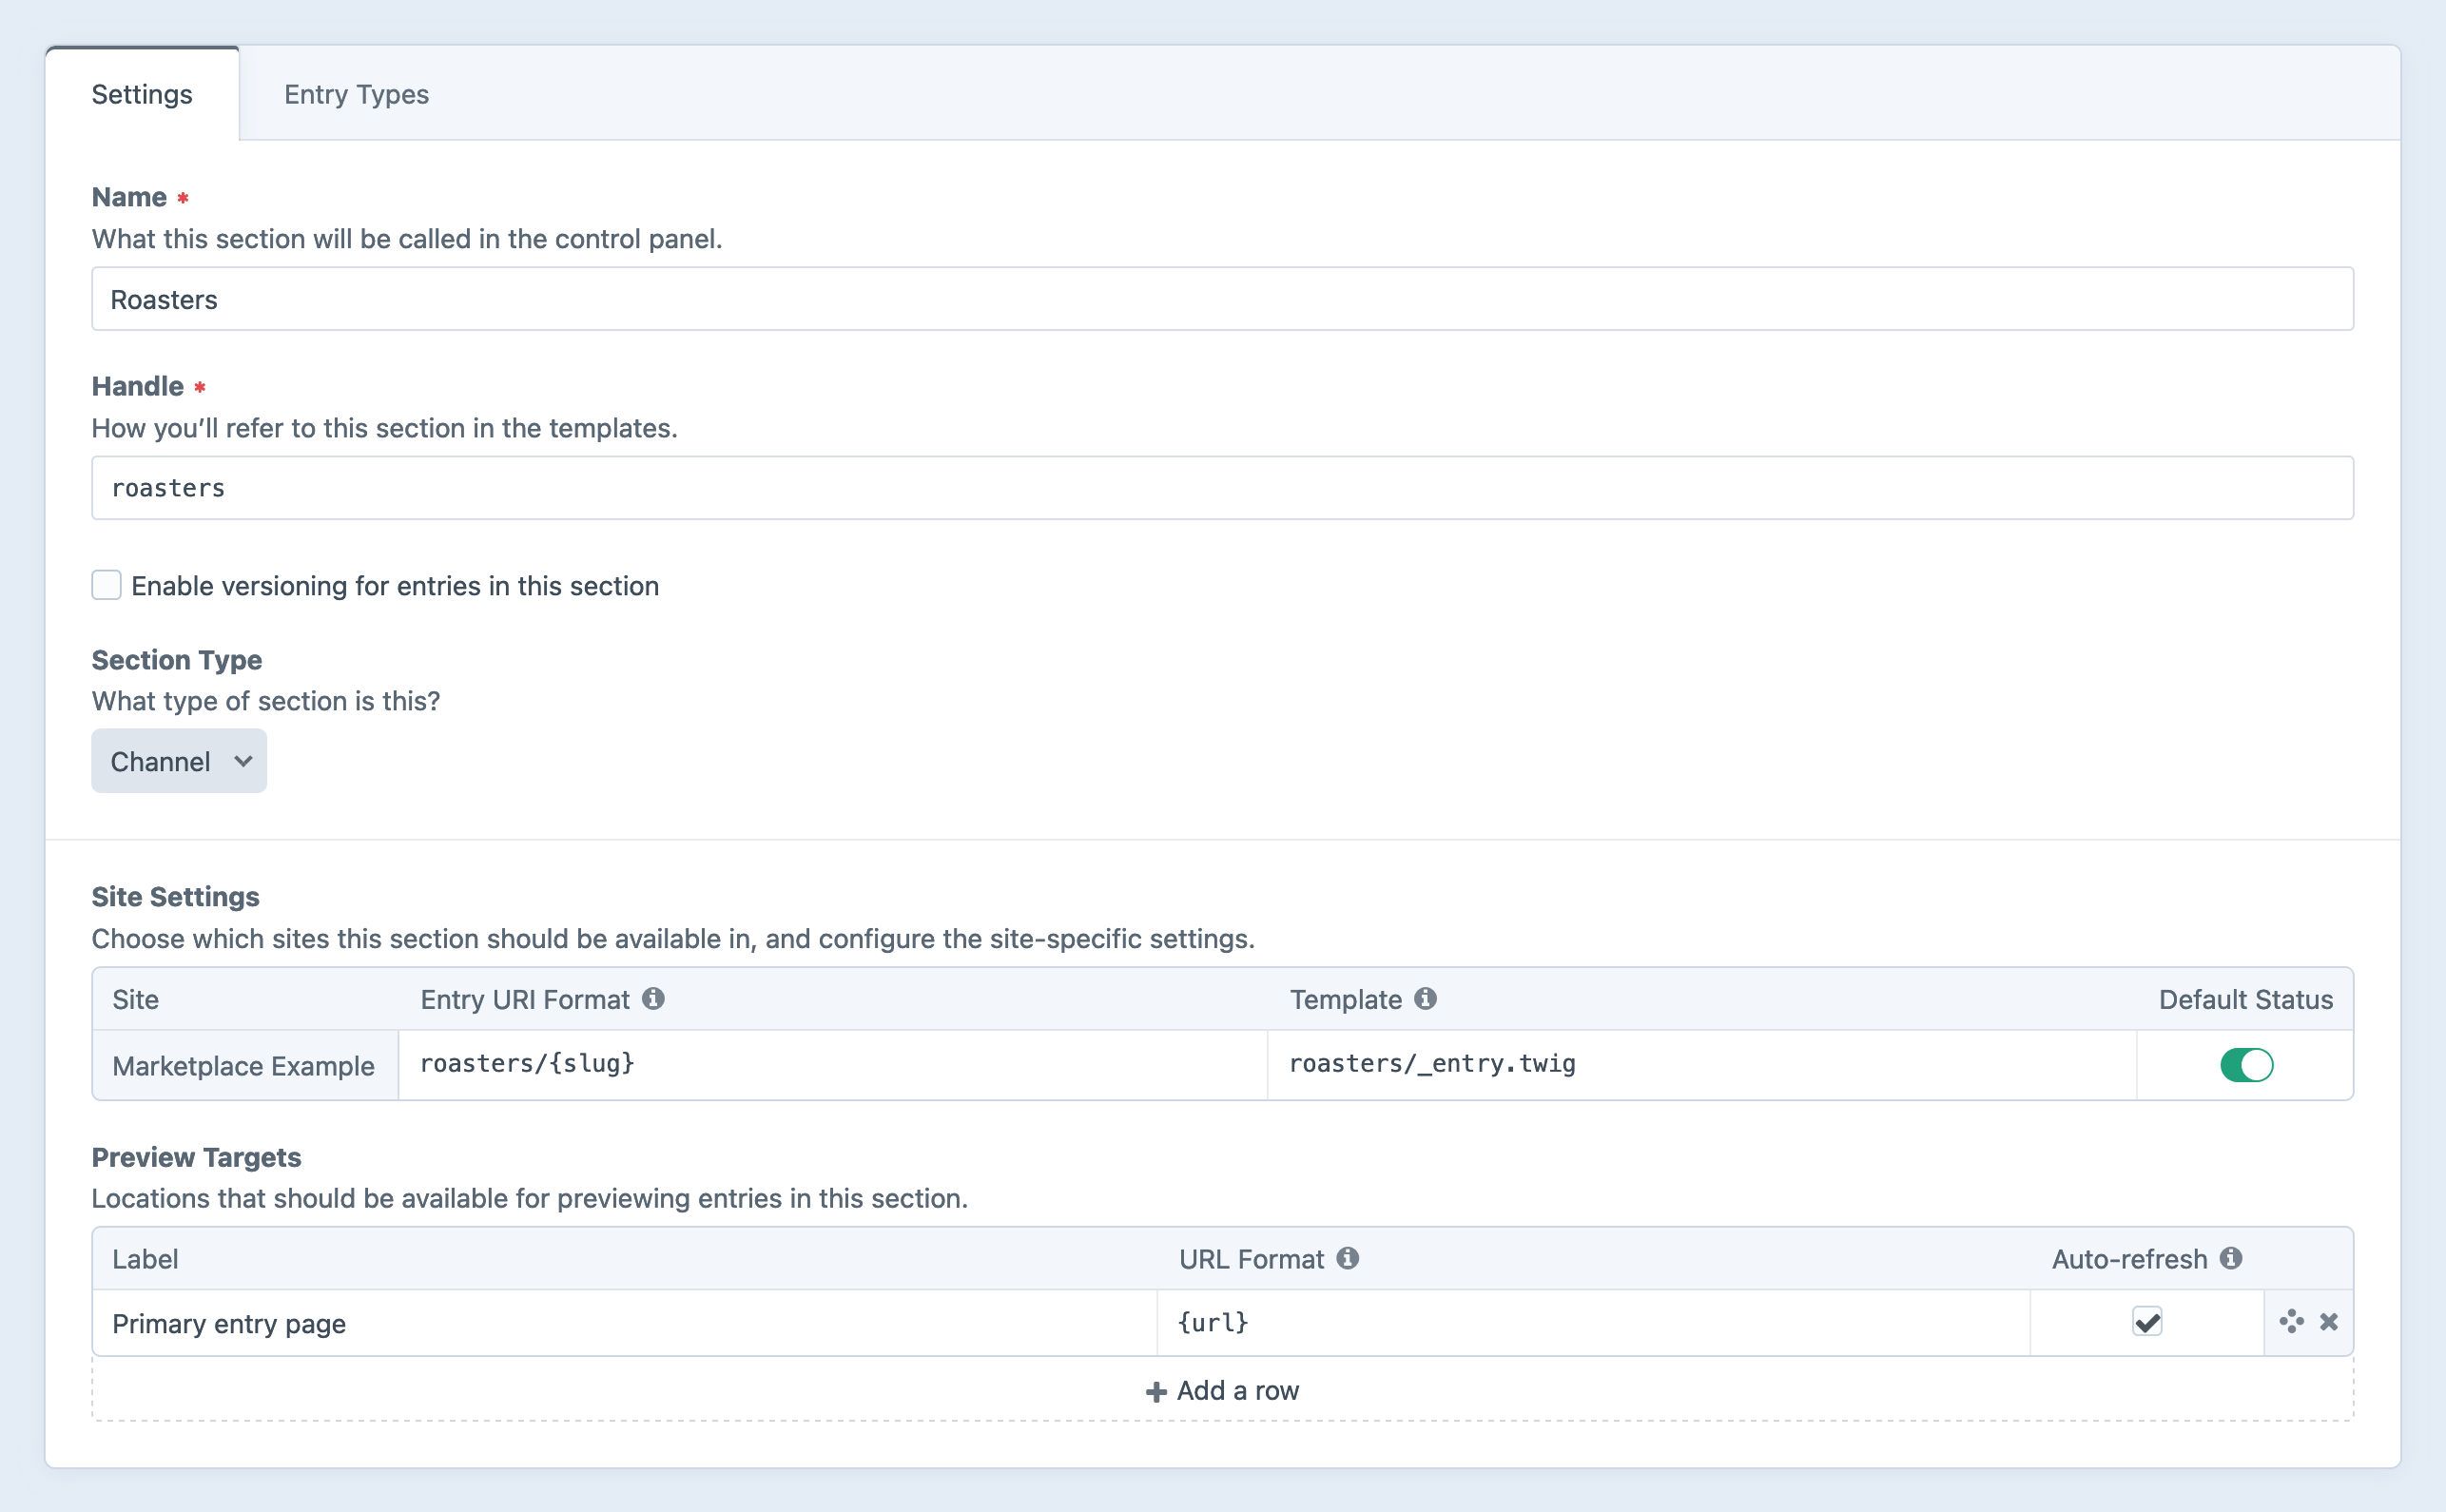
For our coffee marketplace, create a new section called “Roasters.”
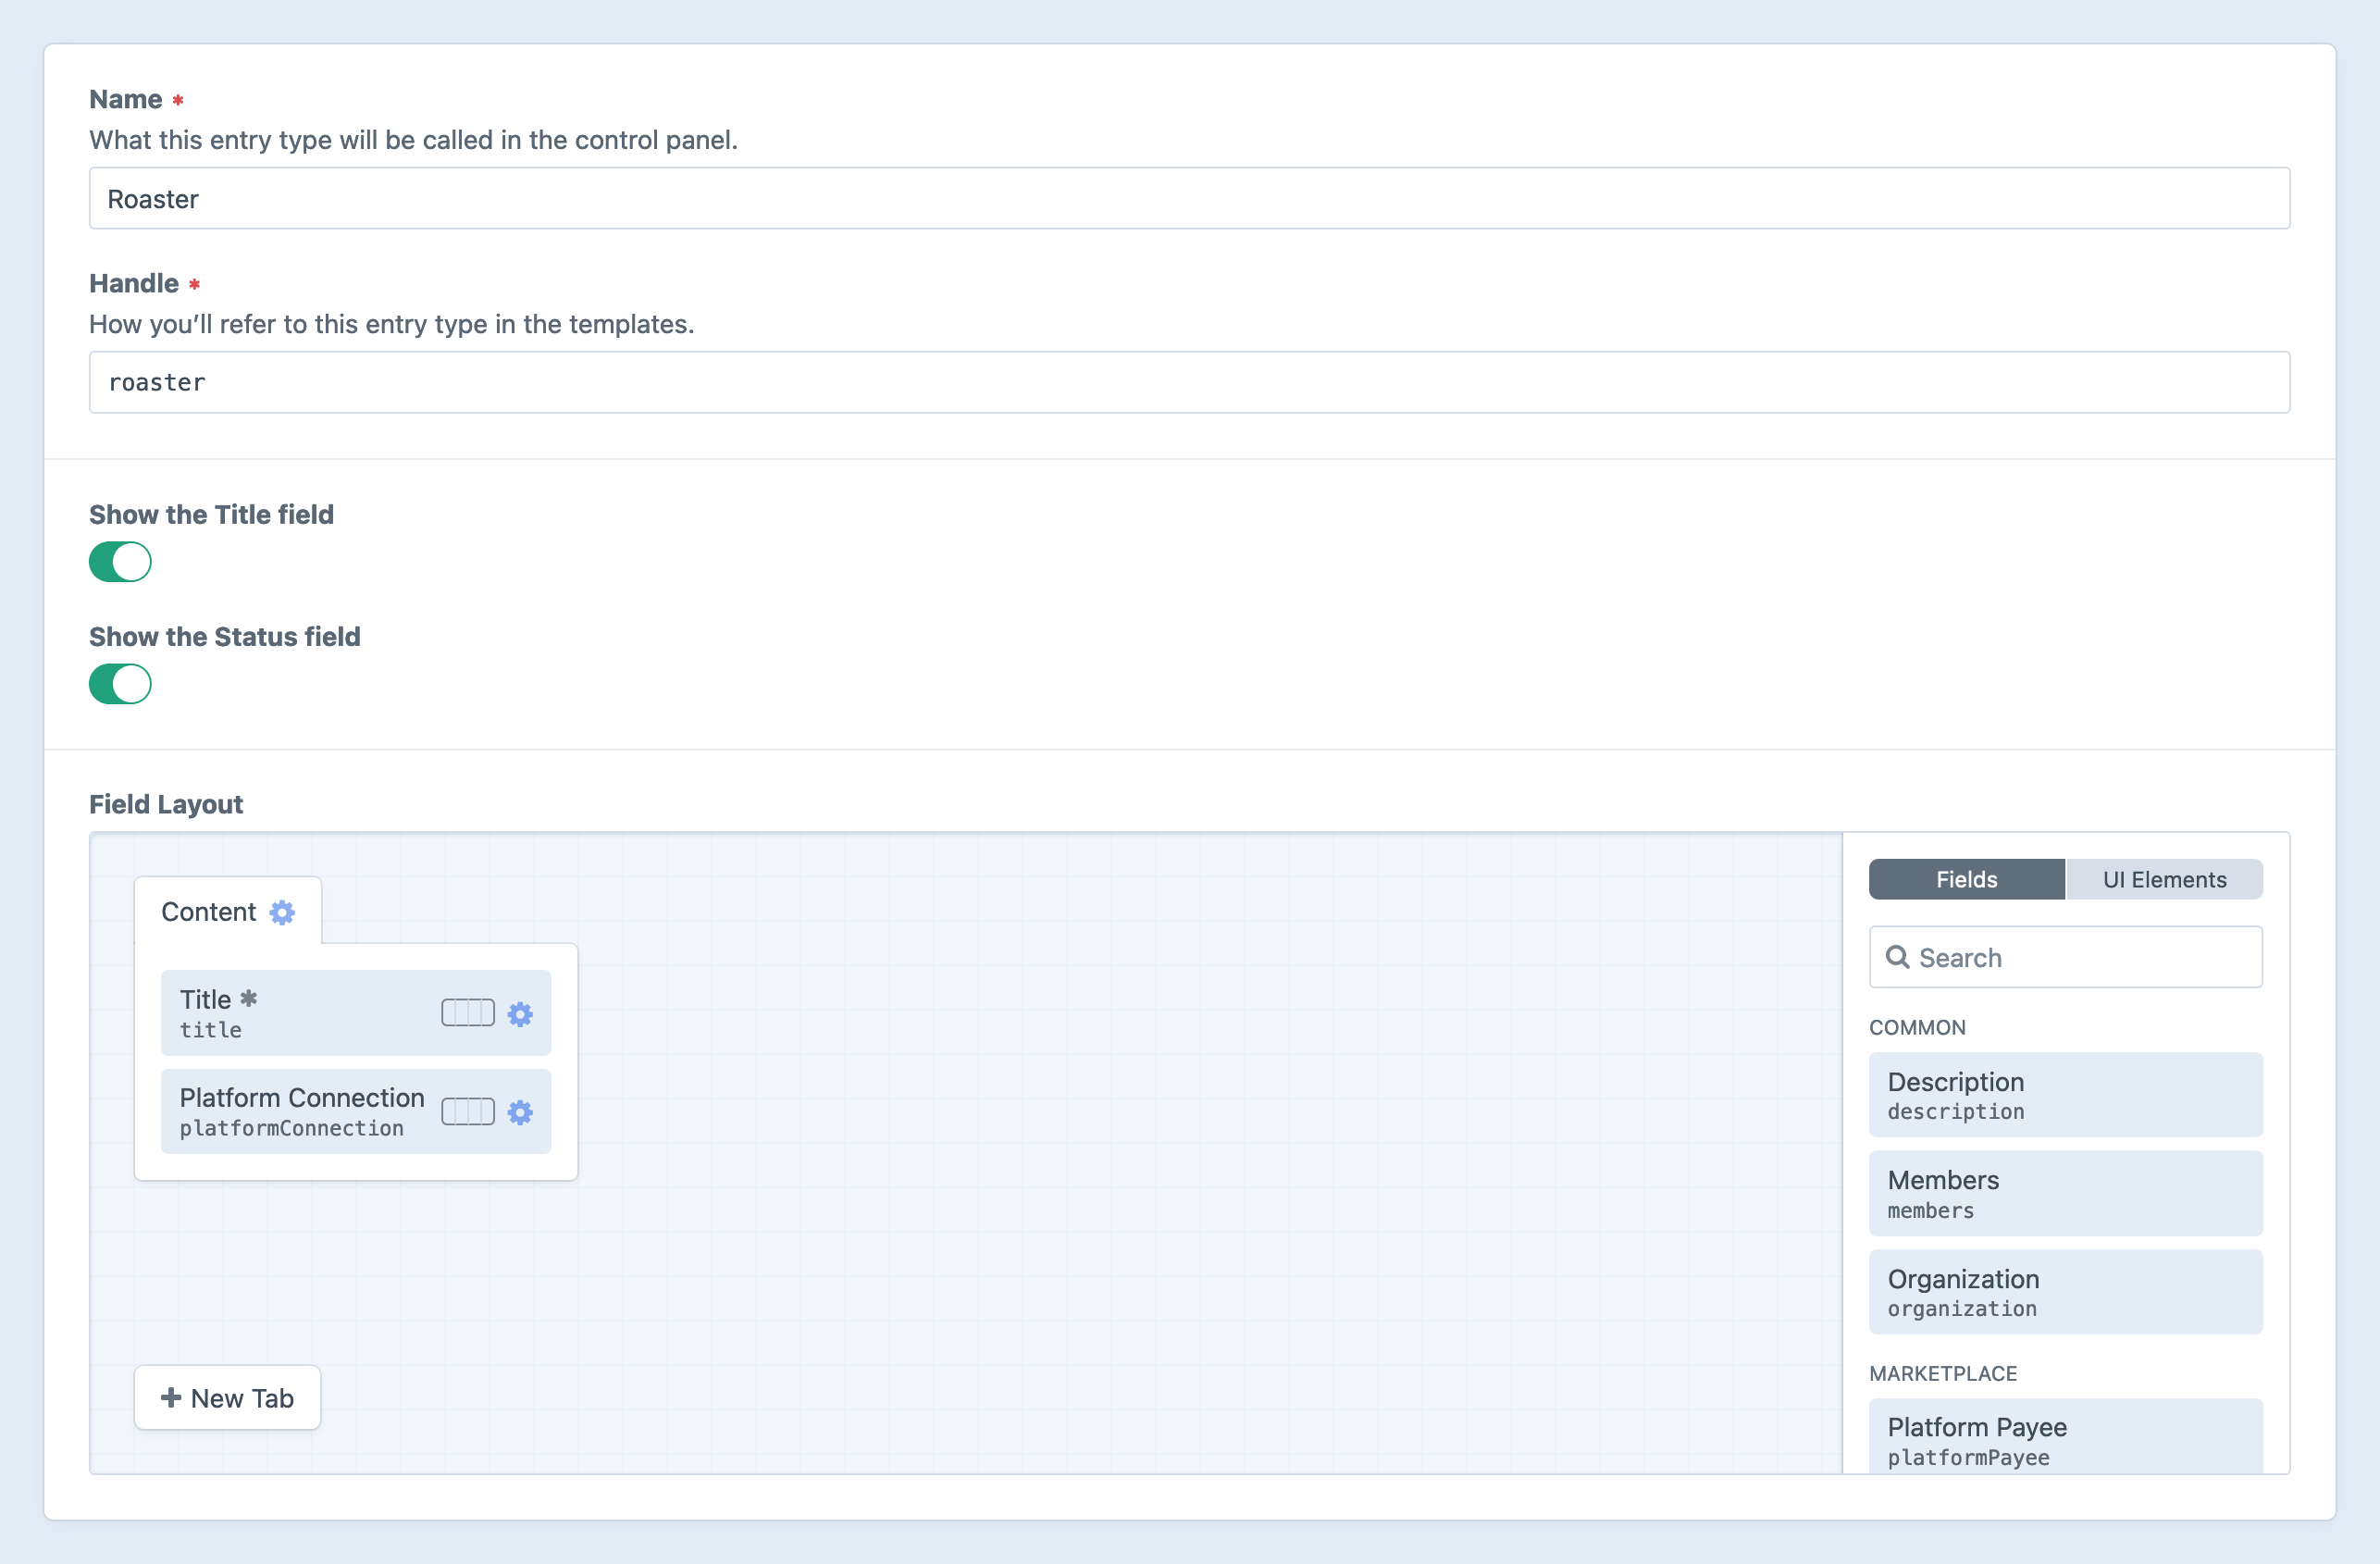
Update the entry type name from “Default” to “Roaster,” and add the new “Platform Connection” field to its field layout.
As with the coffee products, you can now create a few example entries as content to work with.
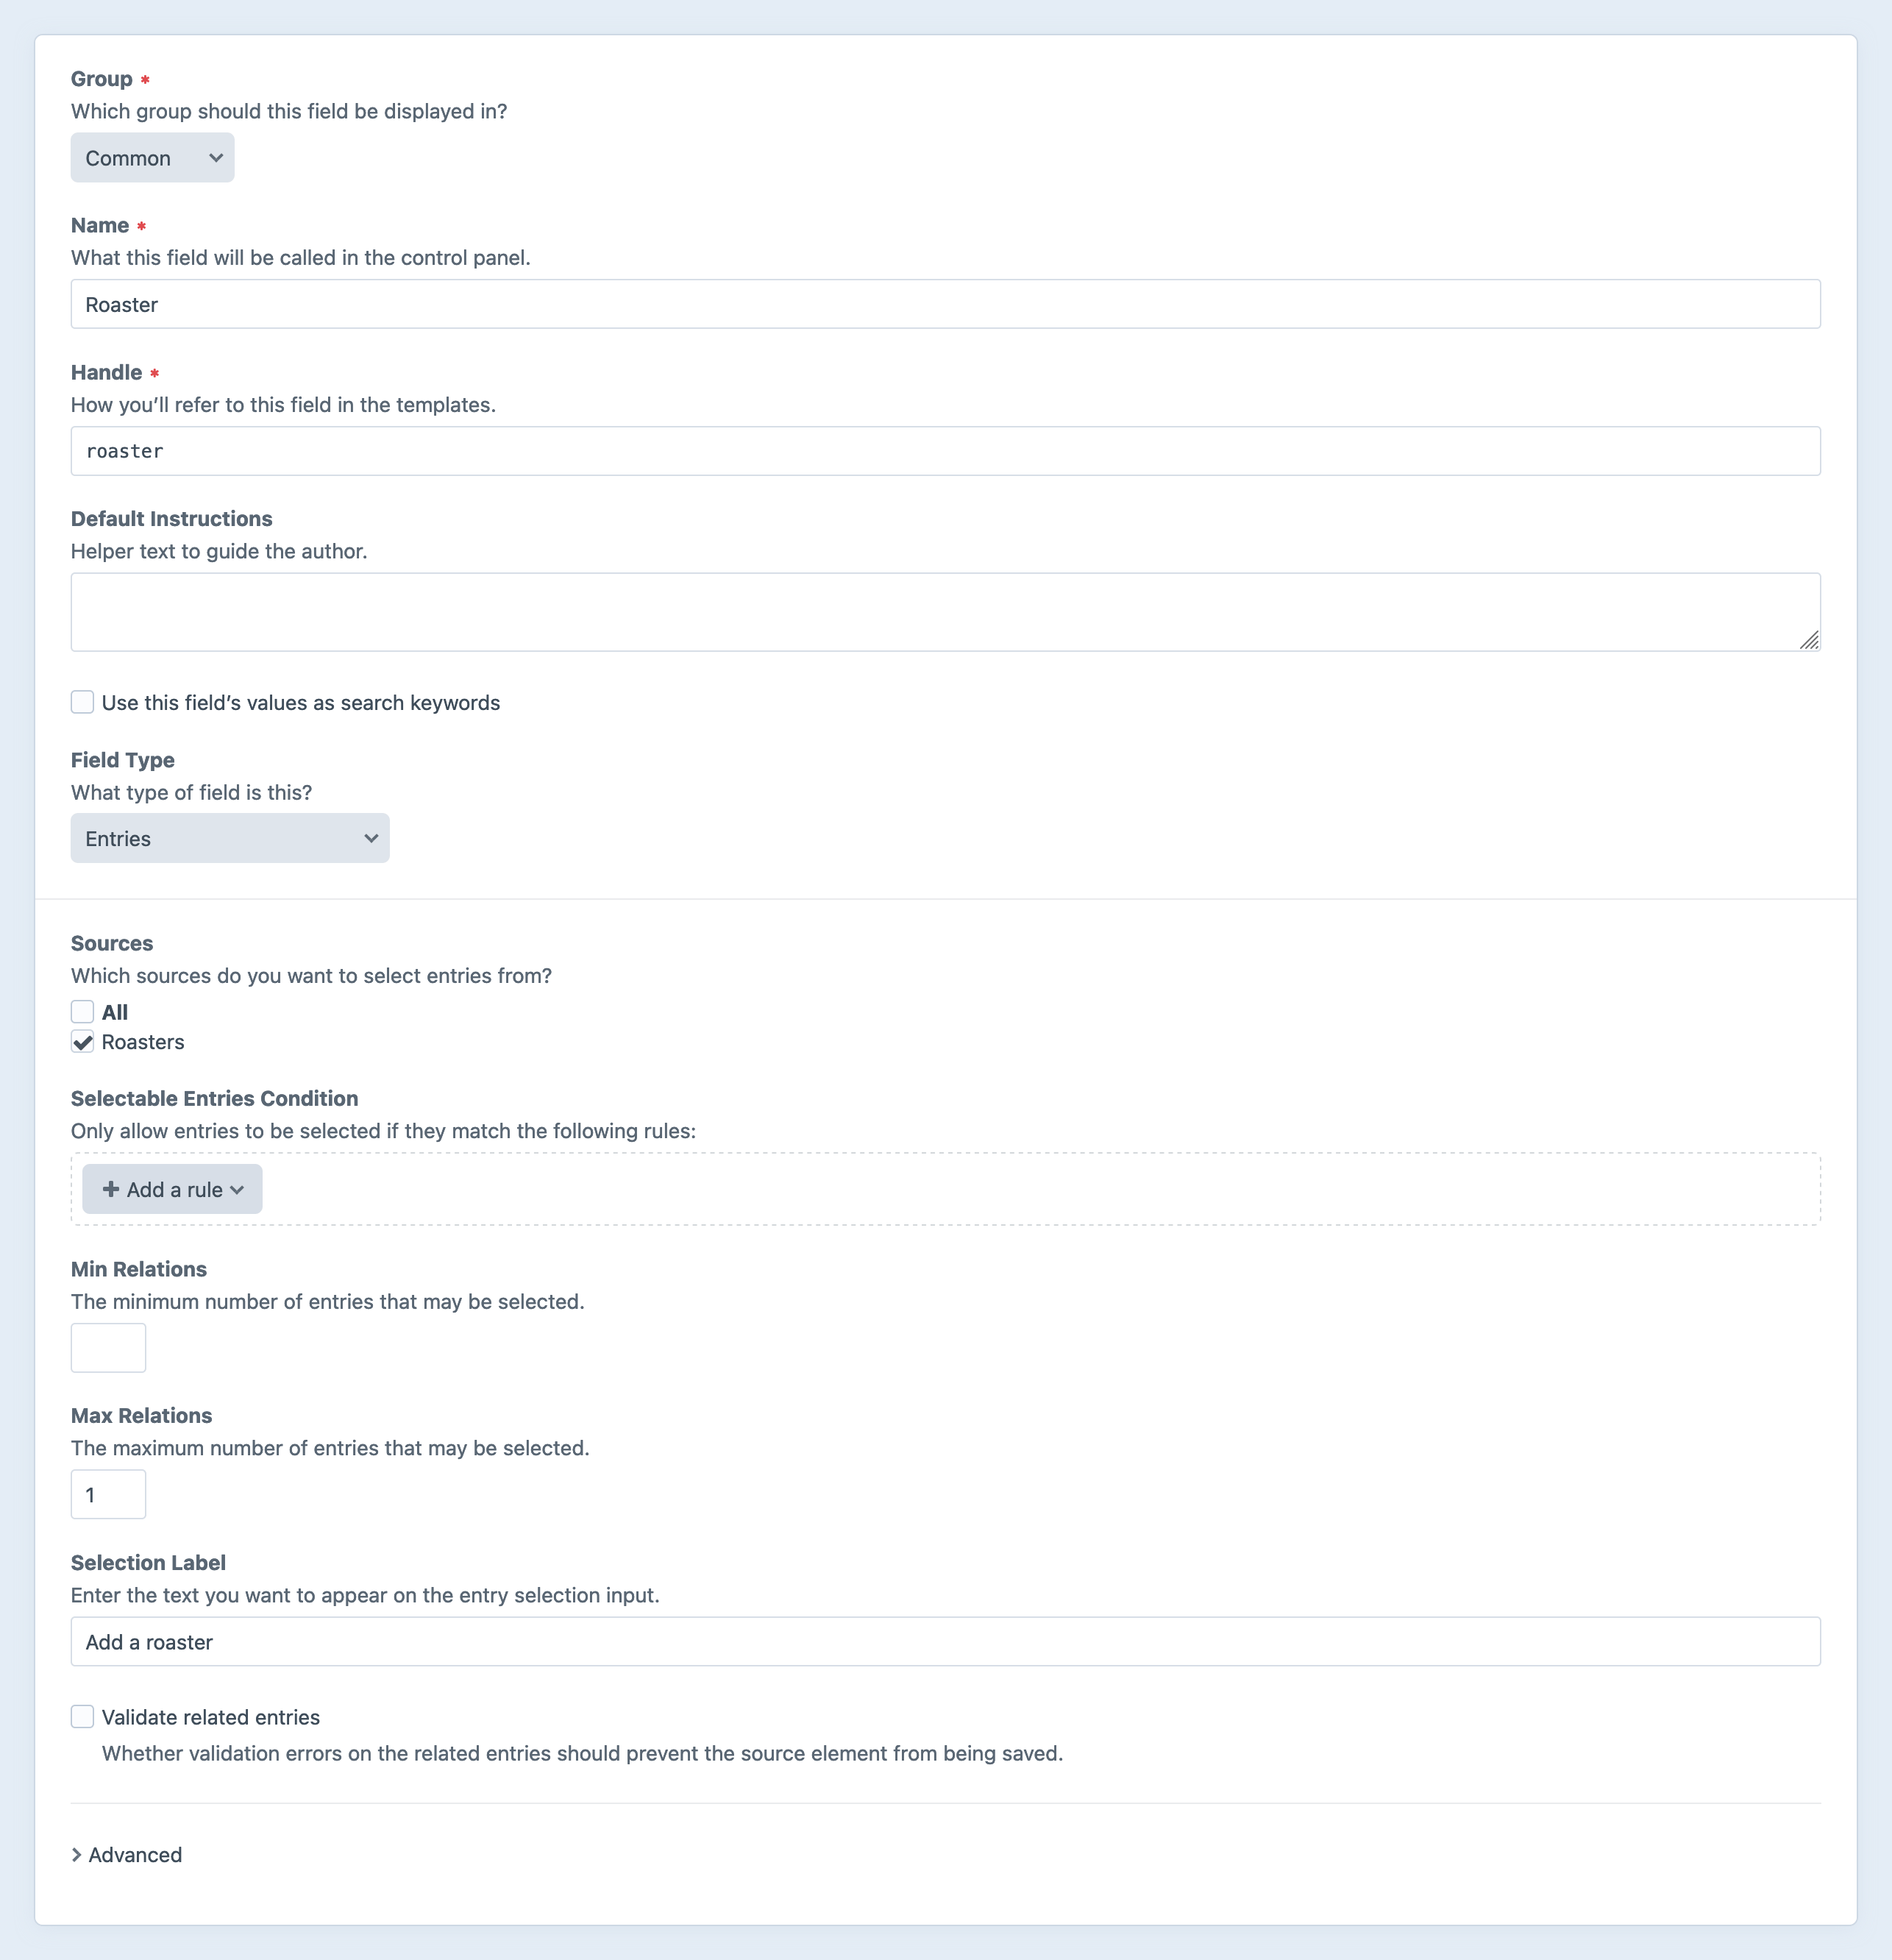
Create an entries field
We’re also going to need an entries field, so we can relate these Roaster entries to other things in Craft:
Update the Coffee product type and products
Now, we have a few roasters and a few coffees (manually) filled in on our marketplace—but nothing has changed on the front-end for end customers. There is still no way to see a specific coffee is coming from a specific roaster. Let’s change that!
Go back to Commerce → System Settings → Product Types → Coffee → Product Fields, to edit your existing Coffee product type. Add the new Roaster field:
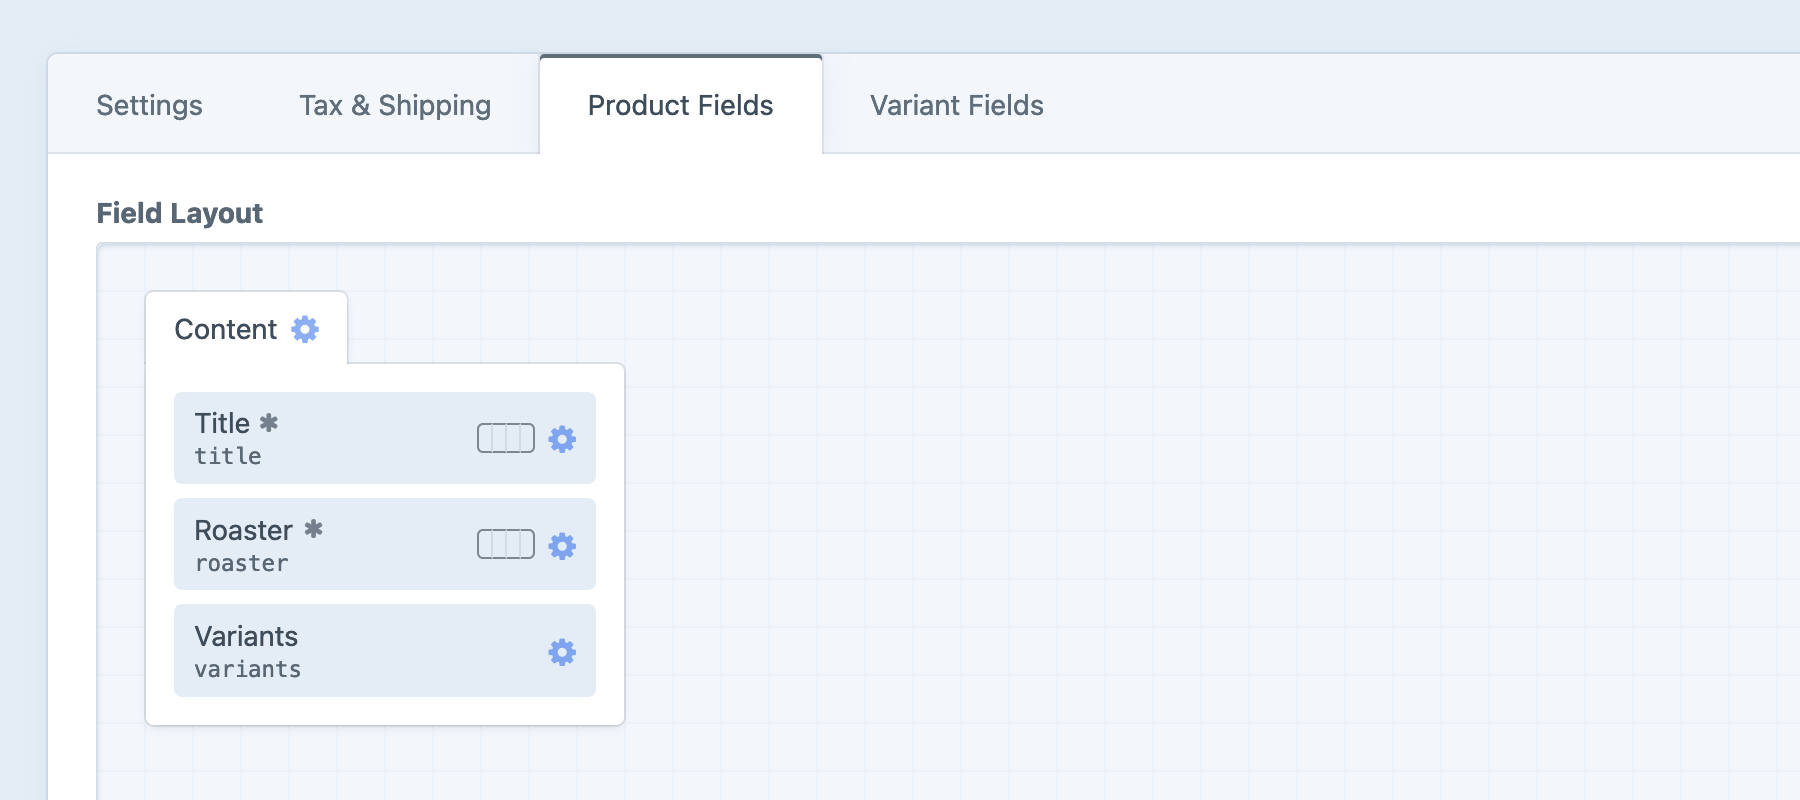
This will make it possible for you to select which product is from which roaster.
This is just Craft, so you can also add any other fields that you like at this stage, like a product image or description.
At this stage, we’re going to fill in some content manually within the Craft control panel. Once your admin area is completely build out, it wouldn’t be you as filling this in, but vendors, as the create products in your custom admin area.
If you have, say, three example coffees and three example roasters, let’s edit each coffee to make it from a different roaster:

Create a user group
In the next section, we’re also going to start onboarding example users. We also need to know which users work for roasters (as opposed to being end customers), and specifically what roaster they work for.
First, go to Settings → Users → User Groups, and add your first user group called “Roaster Team Members”.
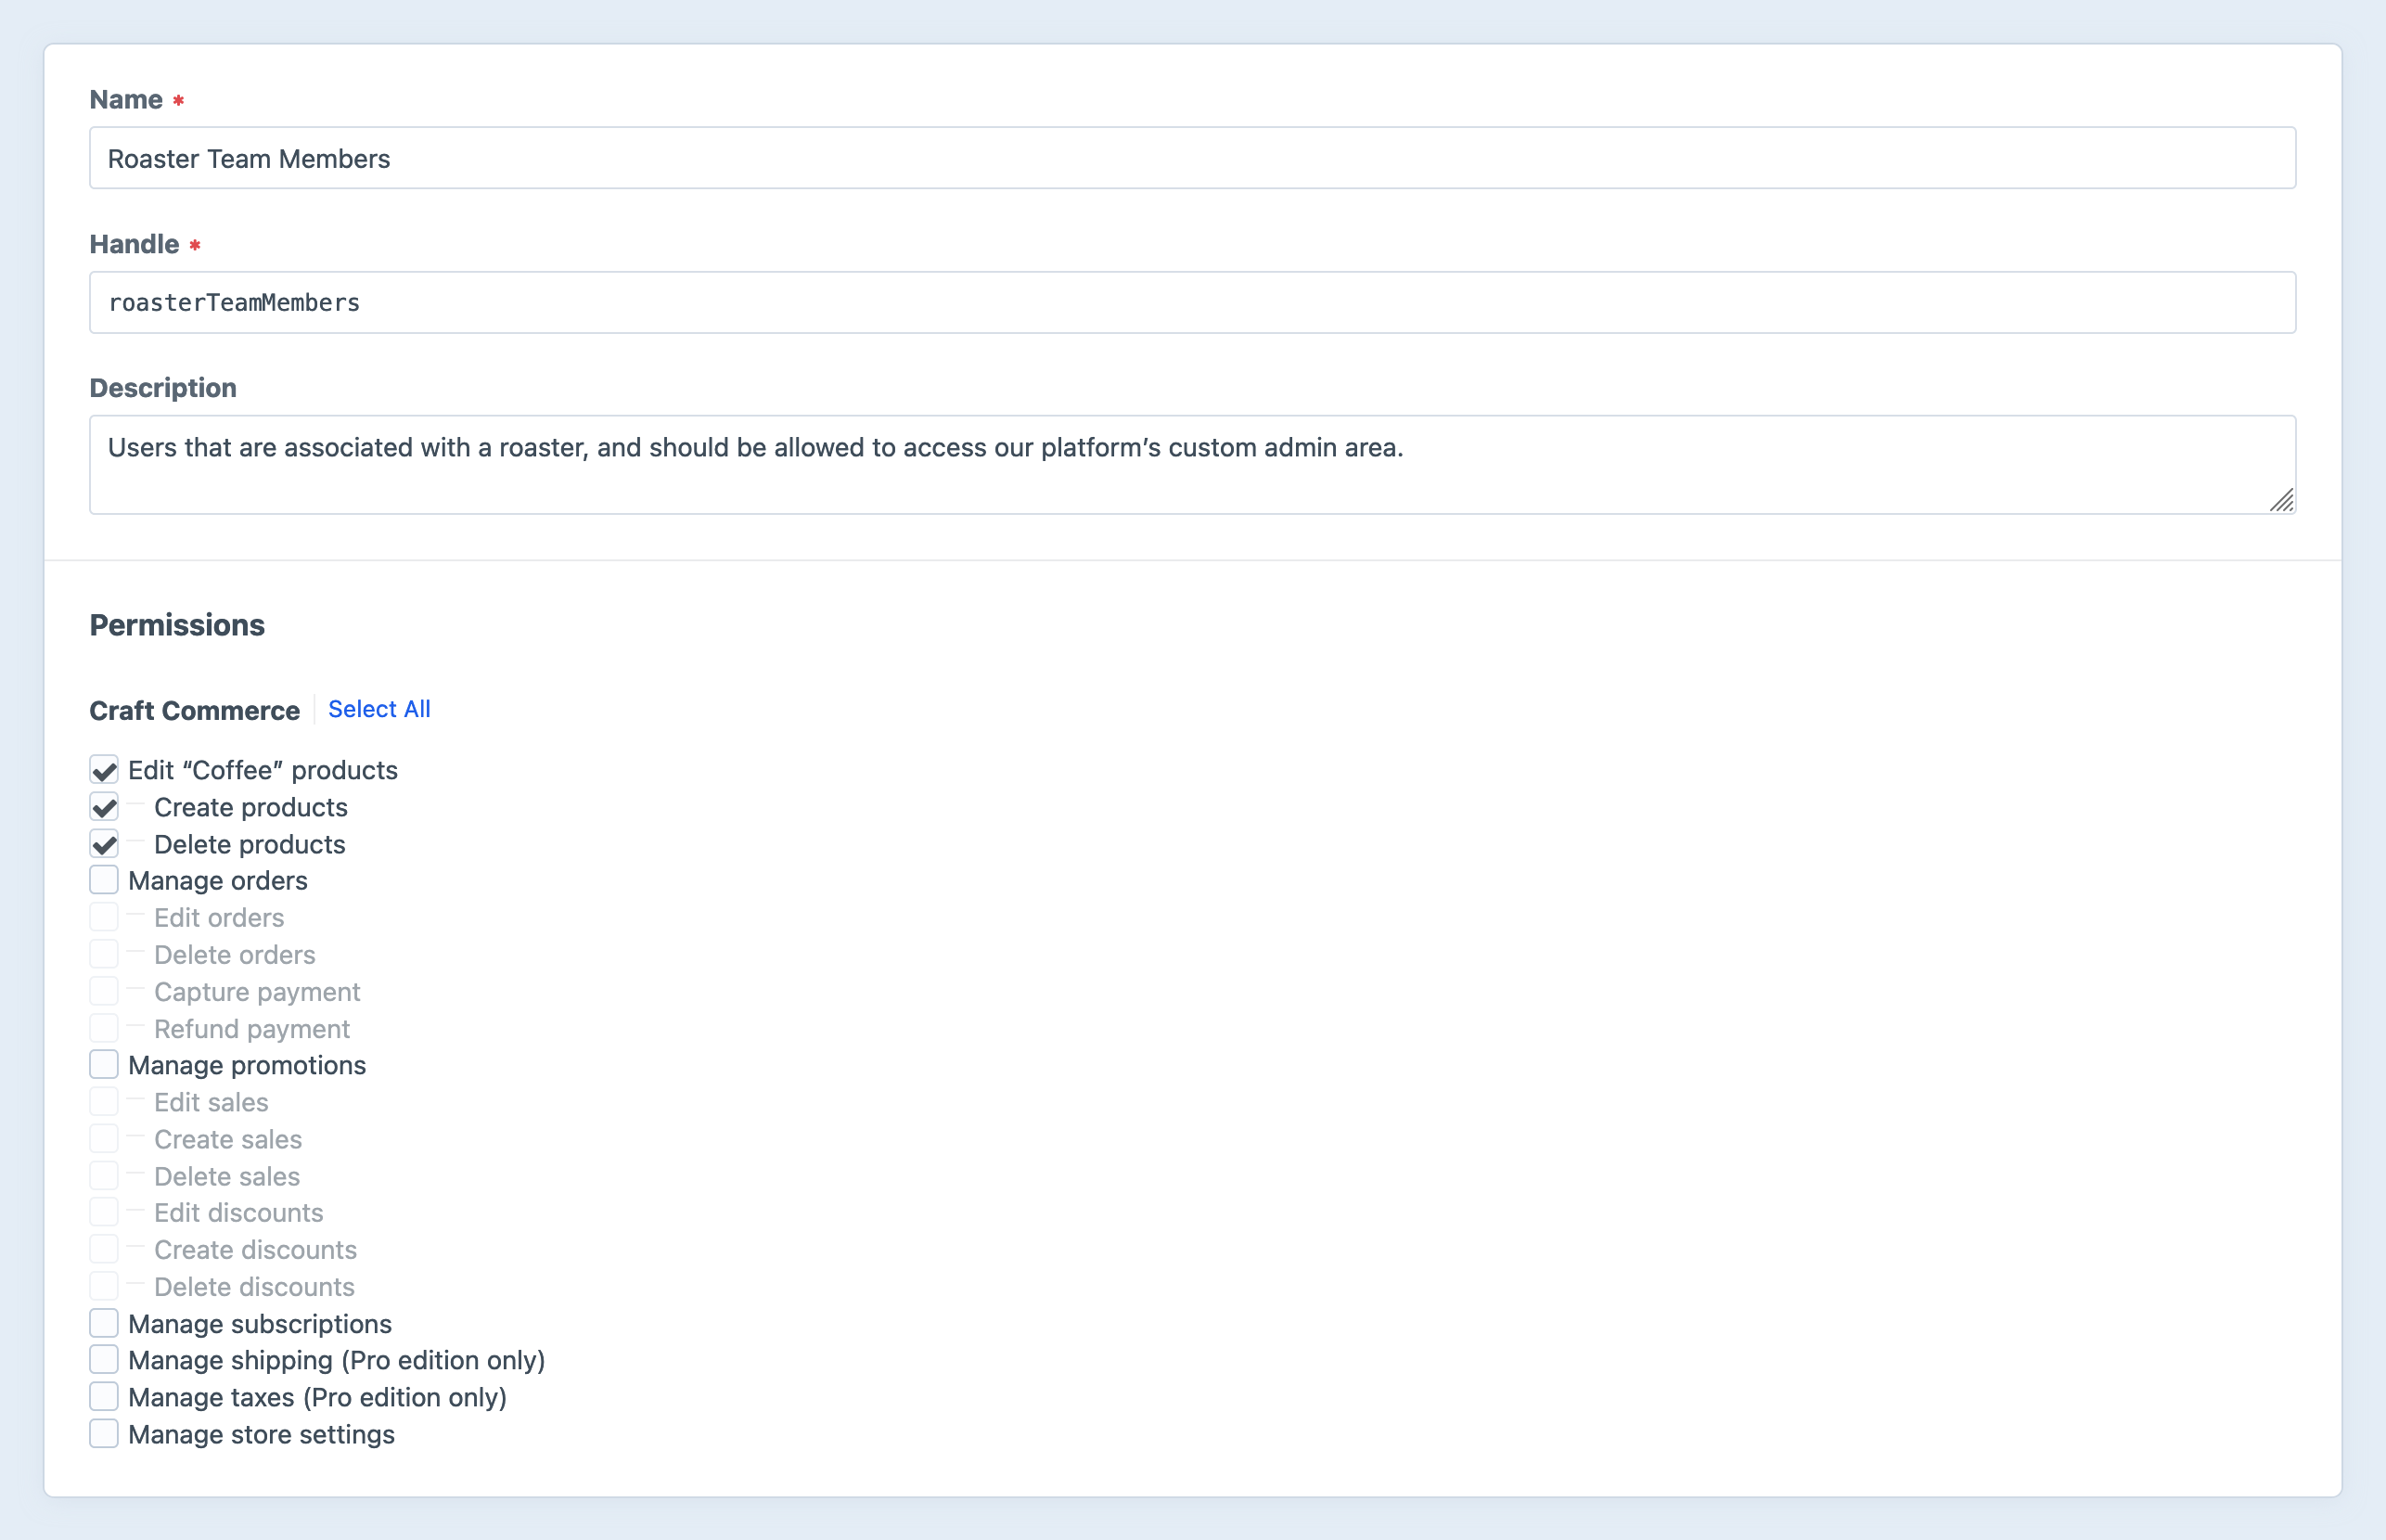
For now, anyone in this group should have permissions to Edit, Create, and Delete “Coffee” products.
Edit the user field layout
Under User Fields, you’ll be able to add the Roaster field to the user field layout. This will let you relate users to a roaster, in the same way you related a product to a roaster.
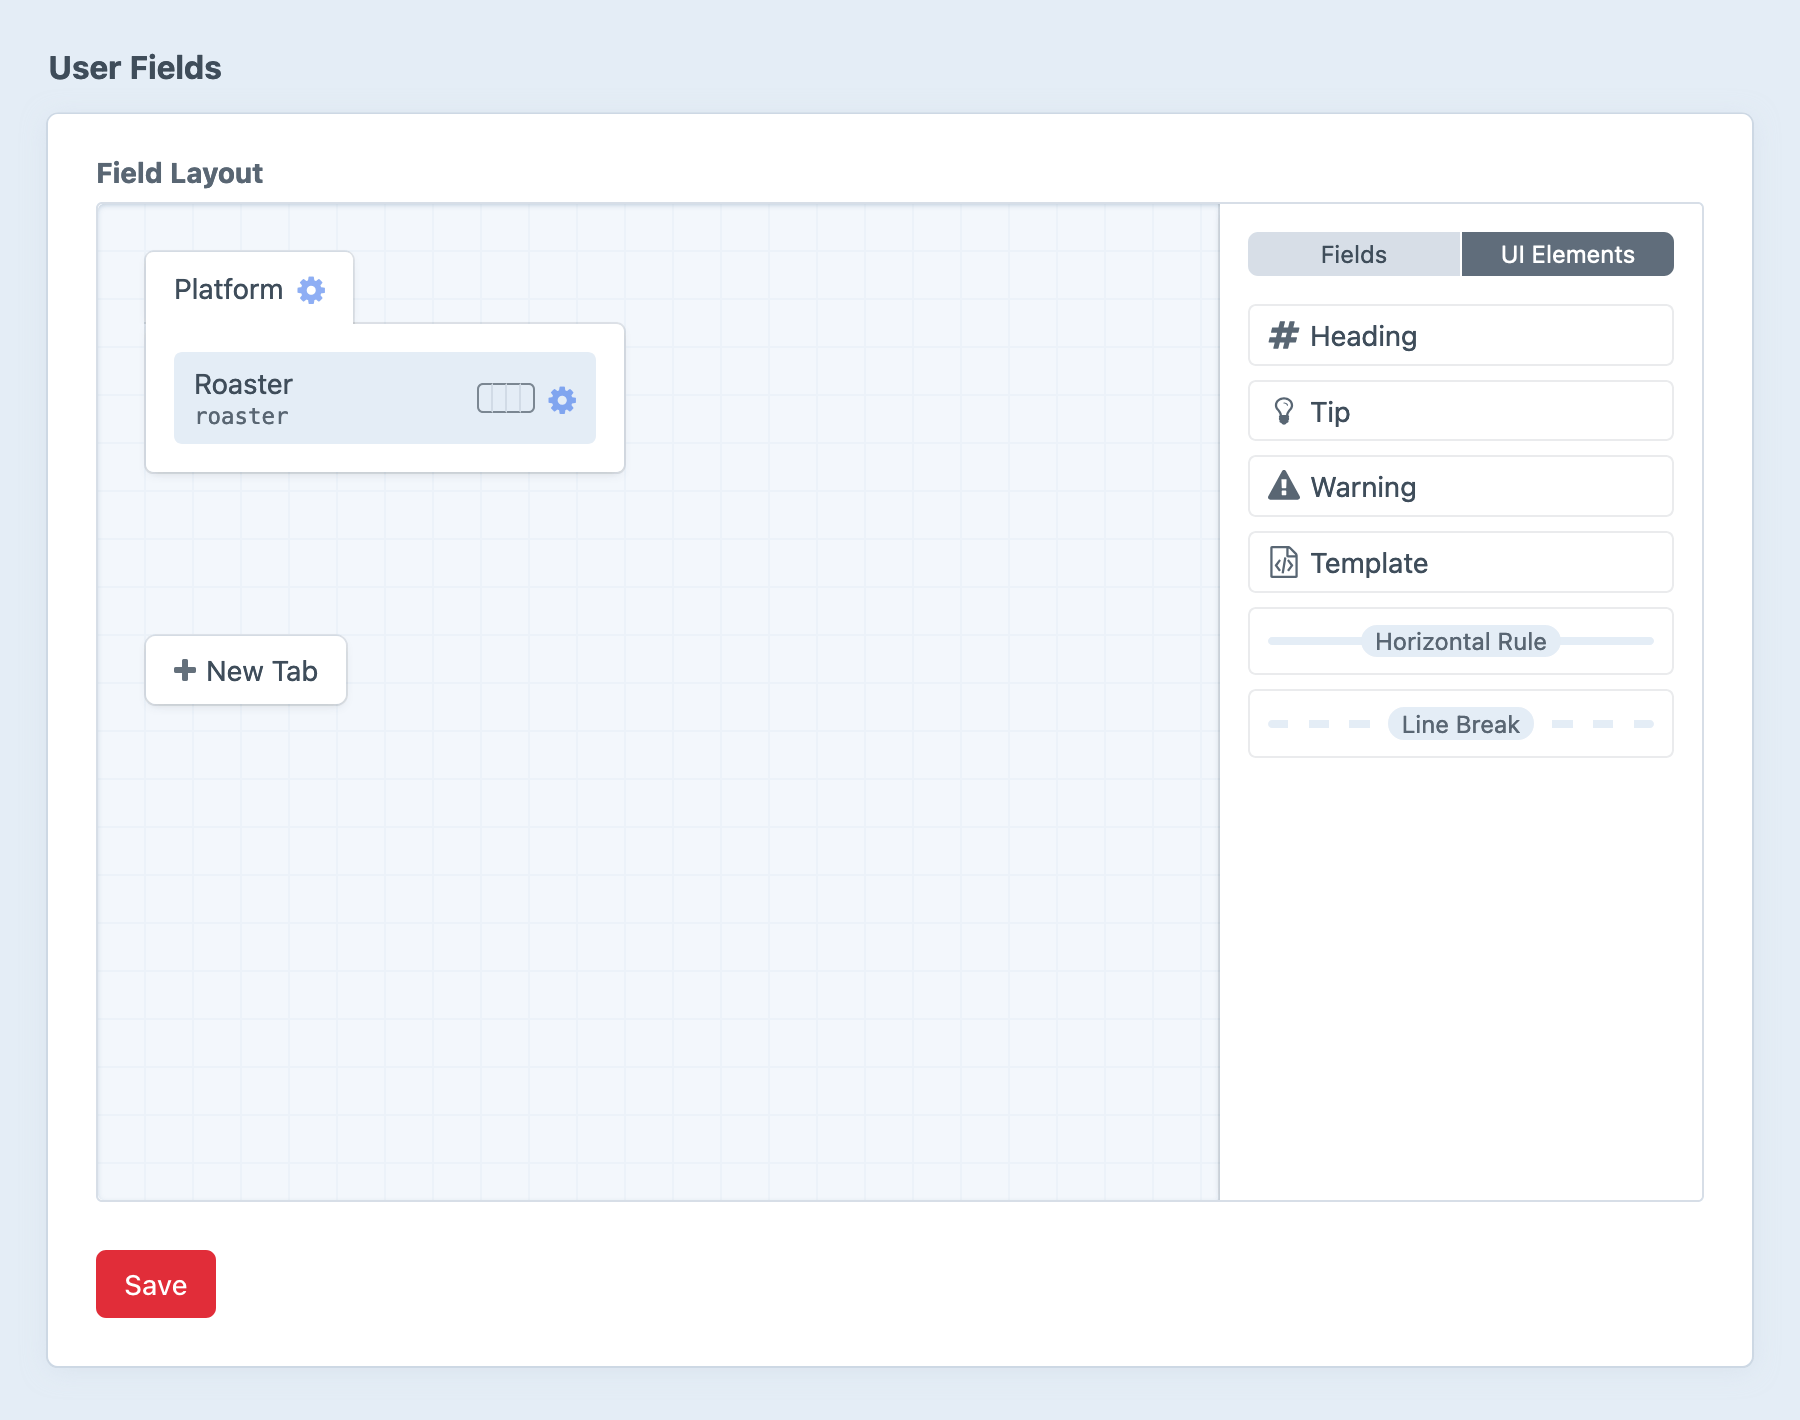
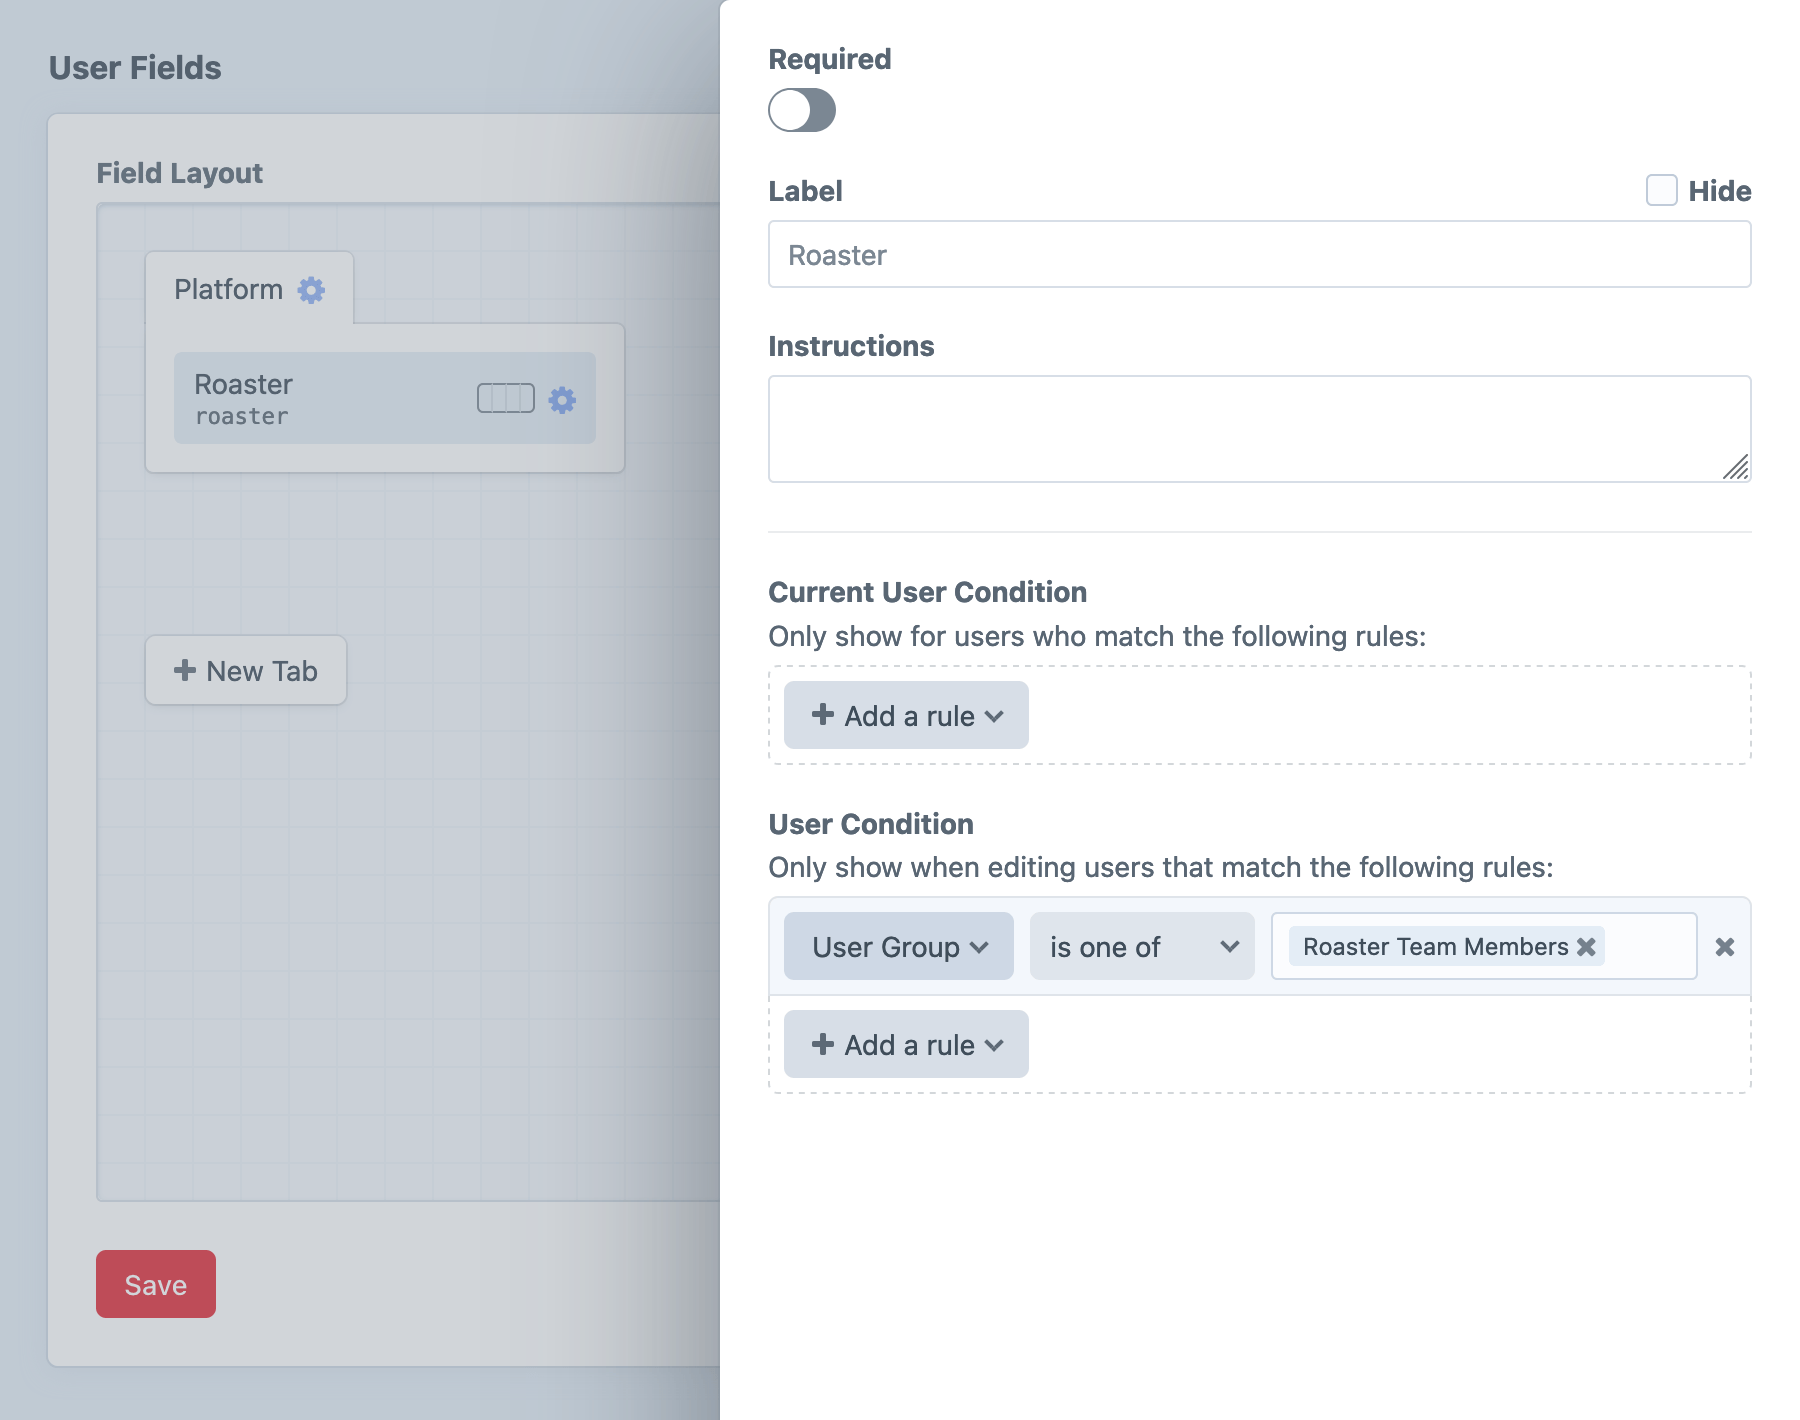
If you’d like, you can take this a step further and user Craft’s conditional fields so that this Roaster field is only visible on a user when they are in the Roaster Team Member user group.
Create another example user or two for us to work with, put them in the Roaster Team Members user group, and relate each one to a different roaster.

You’ll impersonate one of these users in the next section, as if you were onboarding their coffee company onto the marketplace.